
Types of photocopiers onsite
We have two main types of photocopiers on site. One can be used for FollowMe printing AND general photocopier use. The second can only be used as a photocopier. The majority of the photocopiers around the school are FollowMe enabled.
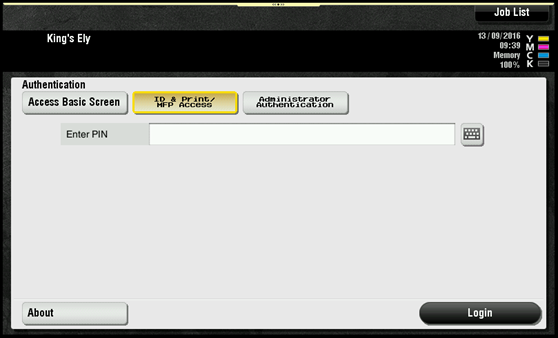
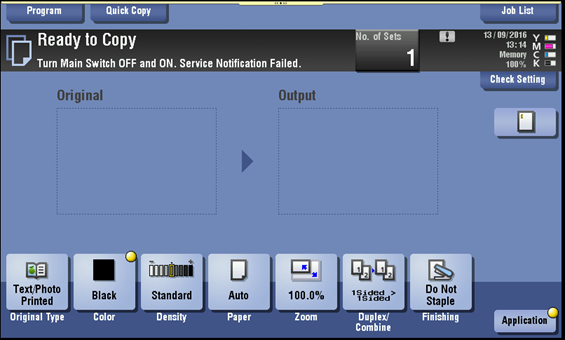
You can easily check which photocopier is a FollowMe enabled device or general use photocopier by looking at the display.
FollowMe Enabled Device

Non-FollowMe Enabled Devices
Logging onto a FollowMe Photocopier
To logon to the FollowMe photocopier, use your finger to press the long white box to the right of “Enter PIN”.
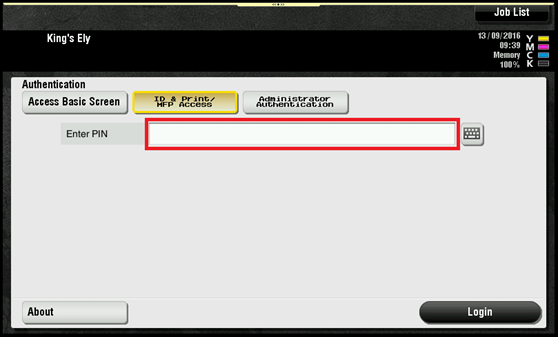
Once you have pressed the box, a keypad will be displayed.
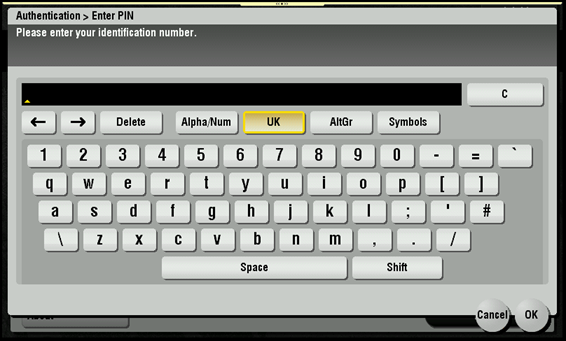
Please use the on-screen keyboard or physical numeric keypad on the right side of the display (where available) to type in your 4-digit PIN as detailed above.
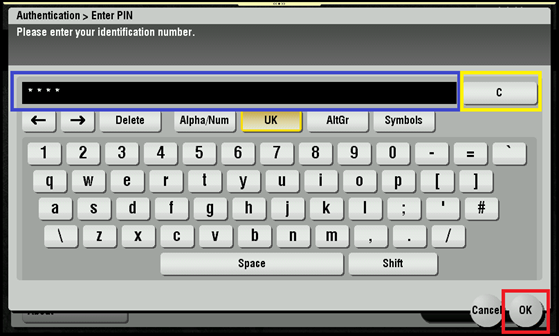
If you see 4 stars in the box highlighted in blue above, then click the OK button highlighted in red. Should you be unsure you have entered the correct PIN, or less than 4 stars appear in the blue highlighted box then use the clear button to the right of the text box, highlighted in yellow then proceed to try again.
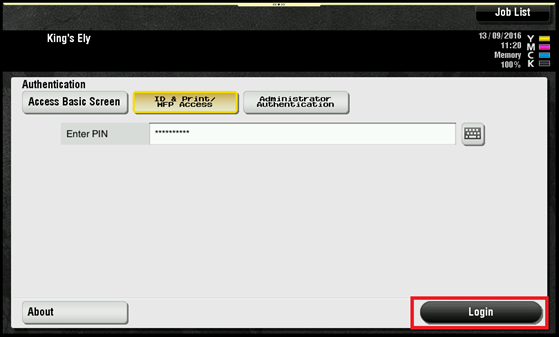
After pressing OK you will be returned to the login screen as before, but with the white text box containing starts. To login press the Login button, highlighted in red below.
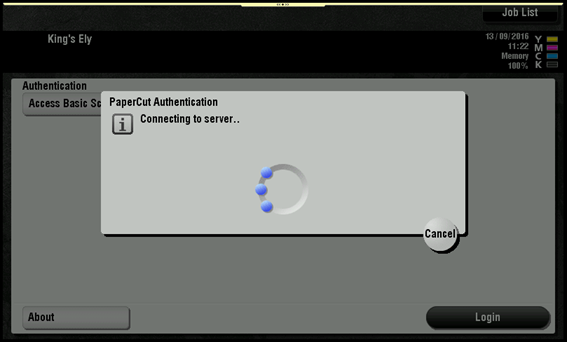
After pressing Login, you will see an image displayed informing you that the photocopier is connecting to the server, please wait for this image to disappear.
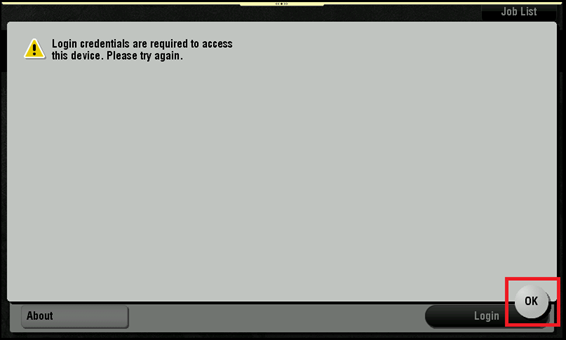
If the PIN you input was incorrect, the photocopier will display an error message (shown below), press the OK button highlighted in red and repeat the above login steps.
Should you continue to have issues logging in, then please raise a support request via the ICT Support Ticket System. This can be done by clicking the RM Support application located on the desktop of any school device.
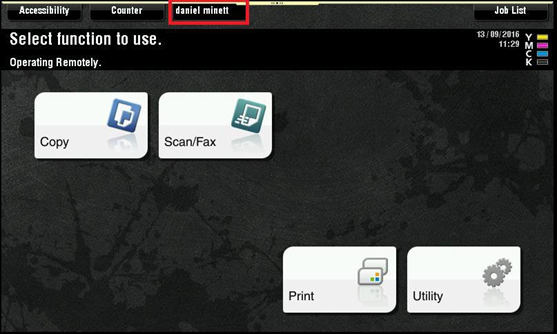
If the login process has been successful, then you will see the below screen displayed. It should be noted that your name will also be visible after logging in, highlighted in red.
Printing
Sending documents to print using FollowMe
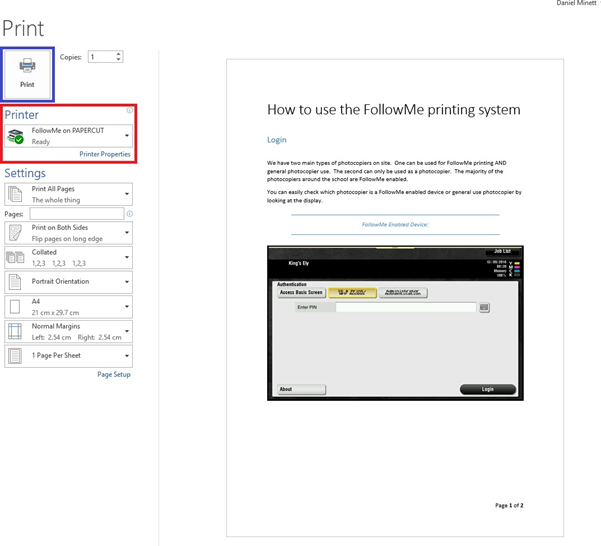
When sending documents to print using FollowMe – Ensure that FollowMe on PAPERCUT is selected under the printer category highlighted above in red, then click the Print button which has been highlighted in blue.
If another printer is displayed, changing it to FollowMe on PAPERCUT can be easily achieved by clicking the downwards pointing arrow on the right of the box and then clicking FollowMe on PAPERCUT.
Should FollowMe on PAPERCUT not display in the dropdown list or as default when printing, then please raise a support request via the ICT Support Ticket System. This can be done by clicking the RM Support application located on the desktop of any school device.
Retrieving documents sent to FollowMe
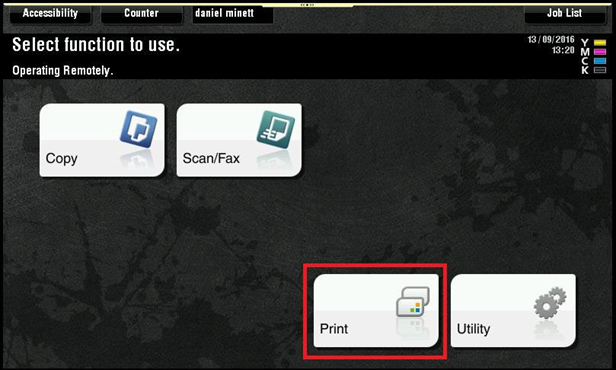
After logging into the FollowMe photocopier, you will need to press Print as highlighted in red below.
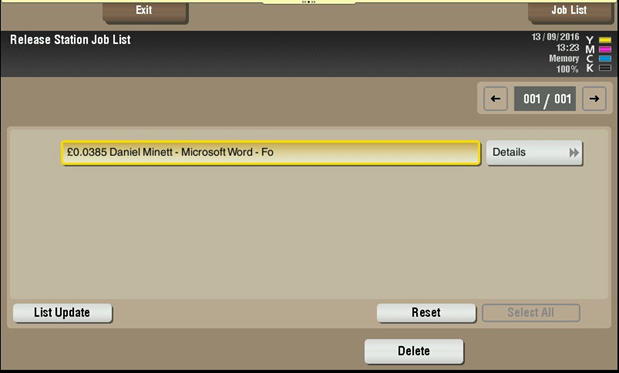
To print your document(s), press each row so that they are highlighted yellow then press the blue button just underneath the right bottom corner of the display.
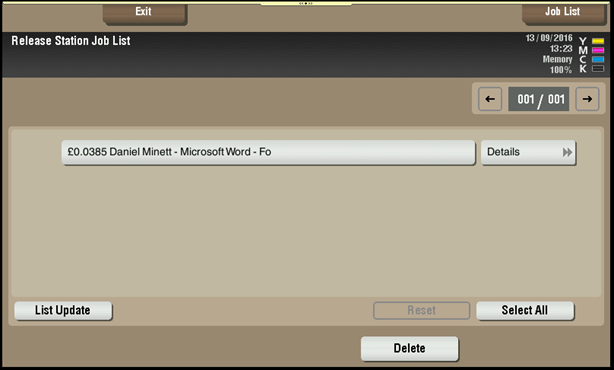
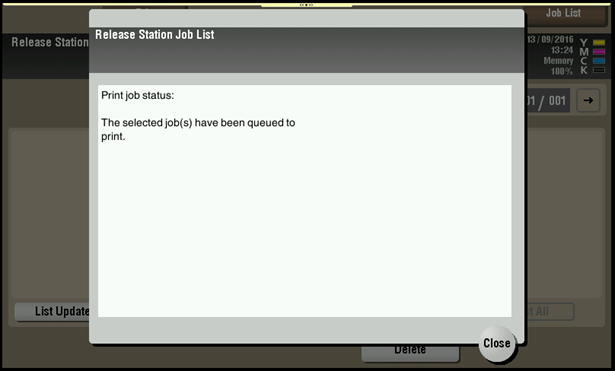
Once you have pressed the blue button, you will be shown the below screen and the document(s) will print
To logout of the photocopier when finished, press the Menu button on the right-hand side of the display. When the menu shows, press the Access button that is located on the right-hand side of the display. Once logged out, you should see the login screen where you typed in your PIN.
Scan to Email
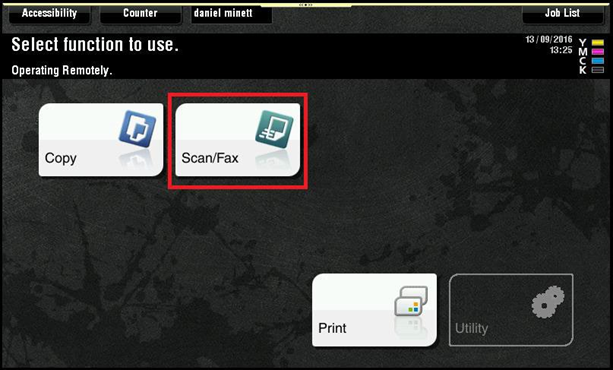
To use Scan to Email, please follow the above steps on how to log into the FollowMe photocopier. Once logged in and seeing the main menu, press Scan/Fan. This is shown below in red.
PLEASE NOTE THAT ALL PHOTOCOPIERS DISPLAY FAX CAPABILITIES – WE DO NOT HAVE FAX ENABLED. IF YOU NEED TO SEND A FAX, PLEASE CONTACT MAIN RECEPTION
To send the document to your email inbox, place the document print side facing upwards on the document feeder, or face down on the scanner glass depending on which method you prefer.
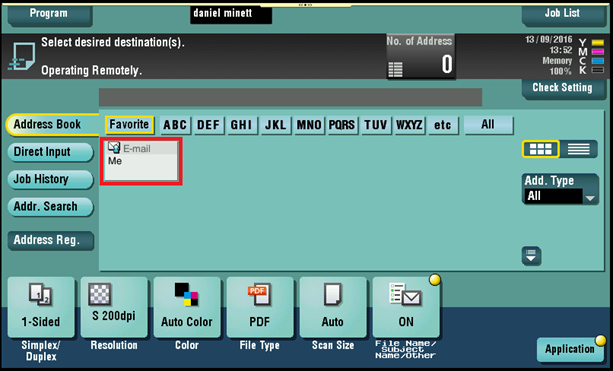
To scan the document, press the Me contact in the address book, highlighted in red above. When selected the box will turn yellow and then you can press the blue button under the bottom right corner of the display.
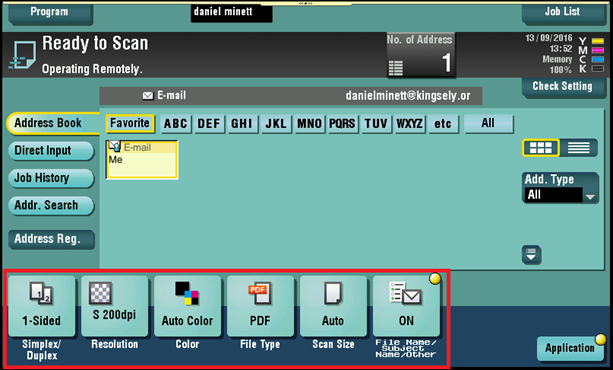
You have the option to change variables such as resolution and file type as highlighted in red above. However, we recommend the current default values set.
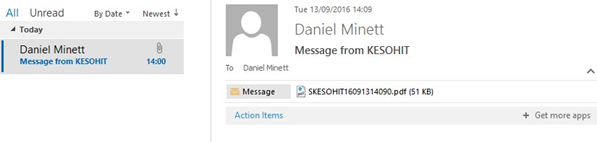
The scanned document should appear in your inbox as shown below with the document as an attachment.
To logout of the photocopier when finished, press the Menu button on the right-hand side of the display. When the menu shows, press the Access button that is also located on the right-hand side of the display. Once logged out, you should see the login screen where you type in your PIN.